
As the last frost recedes and the dormant earth begins to stir, every gardener feels that familiar itch to get back into the soil. In the gardening culture of North America and Europe, the spring reset is more than a chore—it is a ritual of renewal. However, a successful growing season isn’t born in the planting; it’s forged in the cleanup.
Spring cleaning your garden is a vital reset for your ecosystem. By following these seven essential steps, you’ll not only boost your home’s curb appeal but also create a healthy, resilient sanctuary for your plants and local pollinators.
1. The Golden Rule: Timing and the “Wake-Up” Signal
The biggest mistake eager gardeners make is rushing into the yard at the first sight of a crocus. Stepping on waterlogged, post-winter soil can collapse air pockets, leading to soil compaction that suffocates roots all summer long.
- The 50°F (10°C) Threshold: This is the biological “magic number.” Many beneficial insects—such as native solitary bees, lacewings, and ladybugs—overwinter in hollow stems and leaf litter. If you clear your garden too early, you are physically removing your natural pest control. Wait until daytime temperatures consistently stay above 50°F before disturbing the mulch layers.
- The Squeeze Test: Take a handful of soil from a flower bed and squeeze it. If it forms a tight, muddy ball, it’s too wet. If it crumbles like chocolate cake, your garden is ready for your footsteps.
2. Strategic Debris Management: Waste vs. Resource
Winter leaves behind a tapestry of matted leaves and fallen twigs. While it looks messy, this is “brown gold” for your garden’s future health.
- The “Hollow Stem” Habit: Modern ecological gardening (widely popular in the UK and Germany) encourages leaving 8 to 15 inches (20–38 cm) of last year’s flower stalks standing. These provide nesting cavities for pollinators.
- Disease Diagnostics: Not all debris is equal. Inspect your rose beds for leaves with Black Spot or perennial remains with Powdery Mildew. These must be bagged and removed from the property. Never put diseased material into your home compost bin, as the heat rarely gets high enough to kill the spores.
- Shredding for Success: For healthy leaves, don’t bag them for the landfill. Run a mulching mower over them and return that nitrogen-rich organic matter to the soil.
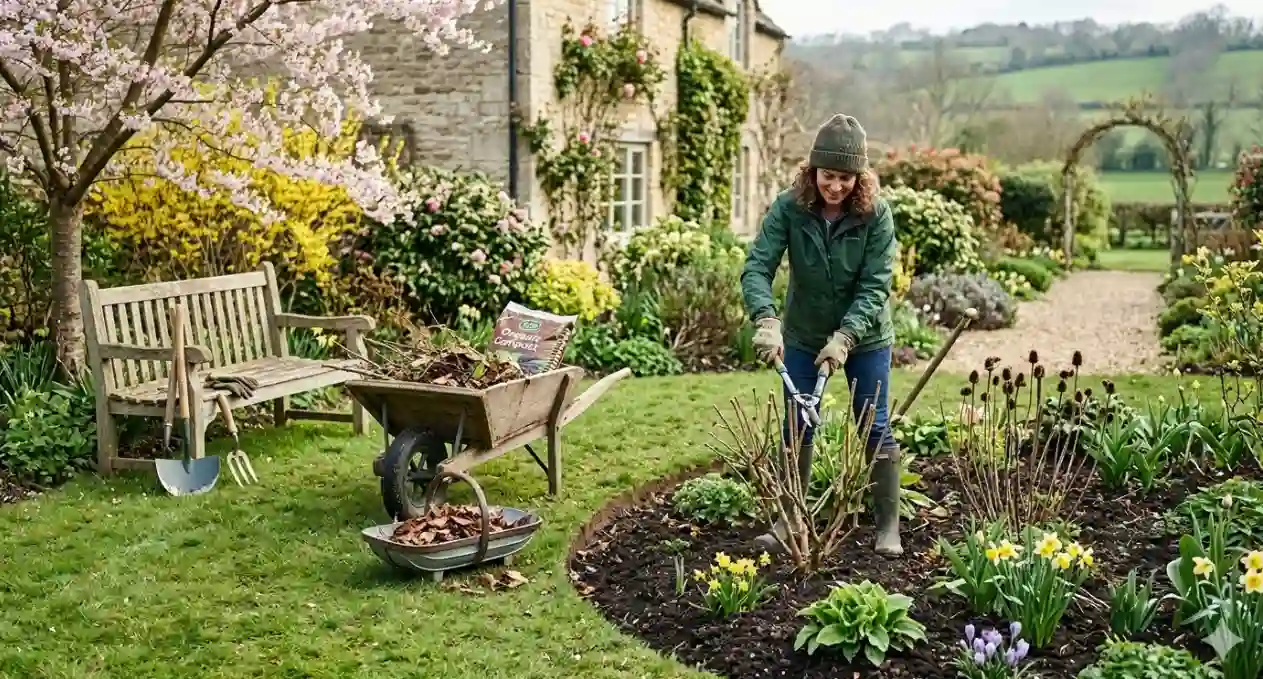
3. Precision Pruning: The Master’s Touch
Pruning is the most technical part of spring cleaning. It dictates how your garden will breathe and bloom. Understanding the difference between “Old Wood” and “New Wood” is the key to success.
Summer Bloomers (Prune Now)
These plants bloom on the growth they produce in the current year. Pruning them now stimulates vigorous new stems.
- Panicle Hydrangeas (Hydrangea paniculata): Unlike the blue ‘Endless Summer’ varieties, these can be cut back by one-third to create a stronger frame that won’t flop under heavy blooms.
- Butterfly Bush (Buddleia): These can be “hard pruned” down to 12 inches (30 cm) from the ground to prevent them from becoming leggy and woody.
Spring Bloomers (Hands Off!)
Plants like Forsythia, Lilacs, and Azaleas already have their flower buds set on “Old Wood” from last autumn. If you prune them now, you are cutting off your spring display. Wait until immediately after they finish flowering to reshape them.
The 45-Degree Rose Rule
When cleaning up your roses, always cut at a 45-degree angle about 1/4 inch (0.6 cm) above an outward-facing bud eye. This ensures water runs off the cut rather than sitting and causing rot.
4. Master the Edge: Defining Your Sanctuary
Nothing separates a “wild yard” from a “professional landscape” like a crisp, clean edge. In the US, this is a major factor in Curb Appeal, which can increase property value by up to 11%.
- The Victorian Trench: Skip the plastic or metal edging. Use a half-moon edger or a sharp spade to cut a 3-inch (7.5 cm) deep “V” trench between your lawn and your flower beds. This creates a physical barrier that prevents aggressive turf grass from creeping into your perennials while giving the garden a high-end, manicured look.
5. Soil Rehabilitation: The “No-Till” Philosophy
Your plants are only as healthy as the “underground city” they grow in. After winter, the soil is often depleted of nutrients.
- Protect the Mycorrhizae: Avoid the urge to use a heavy rototiller. Modern soil science shows that tilling destroys the delicate fungal networks (Mycorrhizae) that help plants absorb water and nutrients.
- Top-Dressing: Instead of digging, spread a 2-inch (5 cm) layer of high-quality organic compost over your beds. Let the spring rains wash the nutrients down and let the earthworms do the “tilling” for you.
- The pH Check: Spring is the best time for a soil test. If your soil is too alkaline for your blueberries or too acidic for your lavender, apply amendments like elemental sulfur or lime now so they have time to work before peak growth.
6. Proactive Weed Management
The best way to spend less time weeding in July is to spend a little time weeding in March.
- Catch the “Winter Annuals”: Weeds like Chickweed and Henbit germinate in late winter. Pull them before they “go to seed” (bolt), or you will be fighting thousands of their offspring all summer.
- Organic Pre-emergents: For established flower beds, consider using Corn Gluten Meal. It is a natural byproduct that prevents weed seeds from germinating without using harsh synthetic chemicals. Note: Do not use this where you plan to sow wildflower seeds.
7. The Finishing Touch: Mulching with Purpose
Mulch is the “skin” of your garden. It regulates temperature, retains moisture during summer droughts, and suppresses the next wave of weeds.
- Material Selection: Choose shredded cedar or pine bark for a natural look. If you have acid-loving plants like Camellias or Blueberries, use Pine Straw (pine needles).
- Avoid the “Mulch Volcano”: This is a common landscaping error. Never pile mulch against the trunk of a tree or the base of a shrub. This traps moisture against the bark, leading to rot and providing a highway for wood-boring pests. Keep mulch at least 3 inches (7.5 cm) away from the stems.
- Depth Matters: Aim for a consistent 2-to-3-inch (5–7.5 cm) layer. Any deeper and you risk preventing oxygen from reaching the soil.
A Season of Growth Awaits
Spring cleanup is not merely a task to be checked off; it is the foundation of your garden’s health and beauty. By respecting the timing of nature, nourishing the soil, and pruning with precision, you are setting the stage for a lush, vibrant sanctuary that will reward you from the first tulip of April to the last frost of autumn.
Put on your gloves, grab your bypass pruners, and step out into the fresh air—your garden is ready for its comeback.
Quick Spring Checklist for Readers:
- ✅Test soil pH and moisture levels.
- ✅ Sharpen and sanitize pruning shears and mower blades.
- ✅Remove dead annuals and diseased foliage.
- ✅Prune summer-blooming shrubs; leave spring-bloomers alone.
- ✅Cut fresh edges on all garden beds.
- ✅Apply a 2-inch layer of organic compost.
- ✅Finish with a fresh layer of mulch (avoiding the “volcano”!).