Let me start with a story that’s probably too familiar to many of us: Last summer, I returned home from a week-long family vacation to find my front porch ransacked—packages stolen, my doorknob jiggled, and a lingering feeling of violation that I couldn’t shake. I’d always thought “that kind of thing doesn’t happen in my neighborhood”—a naive assumption, as I soon learned. According to the FBI, a burglary occurs every 26 seconds in the United States, with the average homeowner losing over $2,600 per incident. That wake-up call pushed me to completely overhaul my home security setup, and after months of testing, researching, and tweaking, I’ve turned my house from a target into a fortress—all while keeping things user-friendly for my family of four.
If you’re like me—someone who values peace of mind but doesn’t want to live in a “fortress” that feels cold or complicated—this guide is for you. I’m not a security expert, just a regular mom/dad (pick whichever fits) who learned the hard way that home security isn’t about buying the fanciest gadgets. It’s about creating a layered system that deters intruders, alerts you to threats, and keeps your loved ones safe—whether you’re home, at work, or halfway across the country. Below, I’m breaking down every step I took, from choosing the right security cameras to installing sensors that actually prevent disasters, plus the mistakes I made so you don’t have to repeat them.
First: Why Layered Security Matters (Spoiler: One Gadget Isn’t Enough)
Before I dive into the specifics, let’s get one thing straight: There’s no single “magic” device that will protect your home. Burglars are smart—they know how to bypass single-point security, like a lone camera or a flimsy lock. The key is layered security: a combination of devices that work together to create a “no easy entry” zone. Think of it like a puzzle—each piece is important on its own, but together, they form an unbreakable barrier.
Security experts (yes, I talked to a few after my break-in) call this the “3 Ds”: Deter, Detect, Defend. Deterrence keeps intruders away in the first place, detection alerts you when someone tries to break in, and defense ensures you can respond quickly. Every device I installed fits into one of these categories, and I’ll walk you through how to balance them so you’re not overspending or overcomplicating things.
Part 1: Security Cameras—The Backbone of My System (And What to Avoid)
When I first started researching security cameras, I was overwhelmed. There are hundreds of options: wired vs. wireless, indoor vs. outdoor, 1080p vs. 4K, and enough subscription plans to make my head spin. I made the mistake of buying a cheap, no-name outdoor camera first—it broke after two weeks of rain, and the footage was so blurry I couldn’t tell if the person on my porch was a neighbor or a burglar. Don’t make that mistake. Here’s what I learned:
Outdoor Cameras: Weatherproof, High-Res, and Hard to Tamper With
Outdoor cameras are your first line of deterrence—burglars are 300% less likely to target a home with visible security cameras. But not all outdoor cameras are created equal. Here’s what I look for now:
- Weather Resistance: Look for cameras with an IP65 or higher rating—this means they can handle rain, snow, extreme heat, and even dust. My current outdoor cameras (I went with Arlo Pro 5s and Reolink Argus PT Ultra) have IP67 ratings, and they survived our harsh winter and summer thunderstorms without a glitch.
- Video Quality: 4K is nice, but 2K is more than enough for most homes—and it’s cheaper on storage. I opted for 2K resolution, which lets me clearly see faces, license plates, and even the logo on a package thief’s jacket. Avoid 1080p if you can—it’s too blurry for identifying details.
- Power Source: Wireless (battery-powered) is easier to install (no drilling into walls!), but make sure it has a long battery life or a solar panel add-on. I have solar panels on my Arlo cameras, and I haven’t had to charge them in six months—game-changer for busy families. Wired cameras are more reliable but require professional installation, which adds to the cost.
- Smart Features: Motion detection is a must, but not all motion detection is created equal. Look for cameras with “person detection” or “vehicle detection”—this cuts down on false alerts from squirrels, birds, or passing cars. My cameras send me an alert only when a human or car is in the frame, so I don’t get 50 notifications a day. Two-way audio is also non-negotiable—I can yell at a porch pirate from my office, or tell a delivery driver to leave a package by the door.
- Storage: Cloud storage is convenient, but it can get expensive. I use a mix: my Reolink cameras have local storage (a micro SD card) for free, and my Arlo cameras have a cloud subscription ($10/month for one camera) for extra peace of mind. Look for cameras that offer both options—you’ll save money in the long run.
Where to Install Them: I placed cameras at every entry point—front porch, back door, garage, and the side of the house (a common blind spot). I also put one in the backyard, pointed at the patio, to keep an eye on my kids when they’re playing outside. Mount them high enough (8-10 feet) so they can’t be easily tampered with, and angle them down to capture faces, not just the sky.
Indoor Cameras: For Peace of Mind (Not Surveillance)
I was hesitant to install indoor cameras at first—I didn’t want to feel like I was spying on my family or guests. But they’ve become a lifesaver. I use indoor cameras (Eufy Solo IndoorCam C120) in two places: the living room (to watch my dog when I’m at work) and the nursery (to check on my baby when she’s napping).
Key features for indoor cameras: Privacy mode (so I can turn them off when we’re home), night vision (for checking on the baby at night), and integration with smart speakers (I can ask Alexa to show me the nursery camera on my TV). Avoid placing cameras in bedrooms or bathrooms—privacy first!
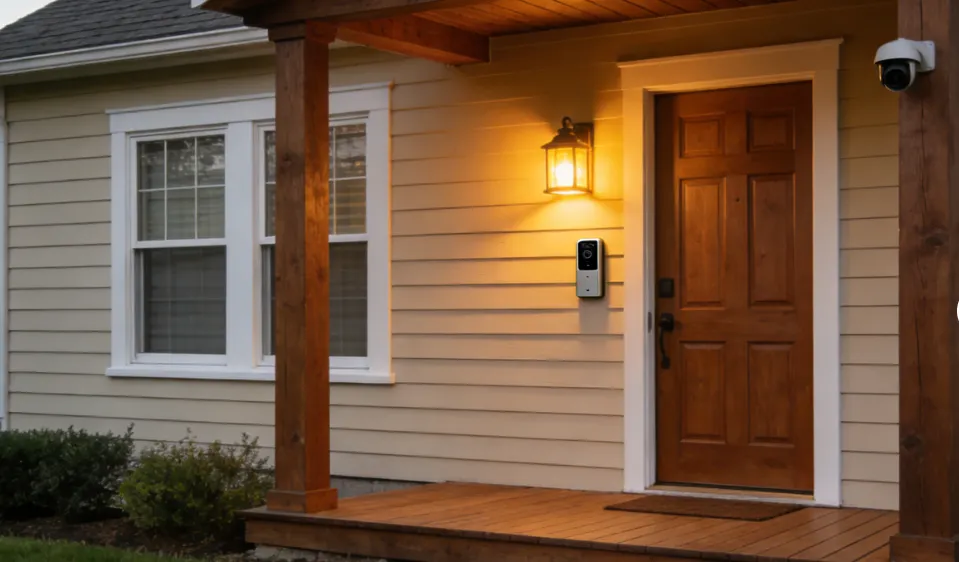
Part 2: Smart Doorbell Cameras—The Unsung Hero of Home Security
If I had to pick one device that made the biggest difference, it’s my smart doorbell camera. Before, I’d always wonder who was at the door—was it a salesperson? A neighbor? A burglar testing the door? Now, I get a notification on my phone every time someone steps onto my porch, and I can see, hear, and talk to them from anywhere.
My doorbell camera (Ring Video Doorbell Pro 2) has stopped two porch pirates in their tracks. Once, a guy tried to grab a package off my porch—I saw him on my phone, yelled through the two-way audio, and he ran away. Another time, a stranger was lingering at my door; I told him I was calling the police, and he left immediately. It’s not just about stopping theft—it’s about knowing who’s at your door before you open it, which is a game-changer for safety.
What to Look for in a Smart Doorbell Camera
- Field of View: Look for a doorbell with a 180-degree field of view—this covers your entire porch, not just the door. My Ring has a 180-degree view, so I can see packages on the steps, people walking up the driveway, and even the street in front of my house.
- Night Vision: Burglars often target homes at night, so night vision is a must. Look for infrared (IR) night vision that provides clear footage even in complete darkness.
- Package Detection: This is a game-changer for anyone who orders online. My doorbell camera alerts me when a package is delivered, so I can bring it inside before it gets stolen. Some models even let you know if a package is moved or taken.
- Integration: Make sure it works with your other smart devices (Alexa, Google Home, your security system). I can ask Alexa to “show me the front door” when I hear a knock, and it automatically syncs with my outdoor cameras so I can see the entire perimeter.
- Power Source: Wired doorbells are powered by your home’s electrical system (no batteries to charge), but wireless (battery-powered) are easier to install. I went with wired because I already had a doorbell, but if you don’t, wireless is a great option—just make sure it has a long battery life.
Pro Tip: Display a sticker from your doorbell camera company on your front door—burglars will see it and move on. I also added a “No Soliciting” sign next to it, which cuts down on unwanted visitors.
Part 3: Sensor Systems—The “Invisible” Protection You Need
Cameras and doorbells are great for deterring intruders, but sensors are what alert you to threats you can’t see—like a window being broken, a door being opened, or even a water leak that could ruin your home. I initially thought sensors were “overkill,” but after a pipe burst in my basement last year (costing me $5,000 in repairs), I realized they’re non-negotiable.
I went with a SimpliSafe system (it’s affordable, easy to install, and works with my cameras and doorbell), but there are plenty of other options (ADT, Vivint, Nest) depending on your budget. Here are the sensors I installed and why they’re essential:
Door/Window Sensors: The Basics
These are the most basic sensors, but they’re also the most important. They attach to your doors and windows—when the door/window is opened, the sensor triggers an alert on your phone and (if you have a siren) a loud noise that scares off intruders.
I installed them on every exterior door (front, back, garage) and every ground-floor window. I even installed one on my garage door—burglars often target garages because they’re less secure. The best part? They’re easy to install (just peel and stick) and don’t require any tools.
Pro Tip: If you have kids who open windows, you can adjust the sensitivity so the sensor doesn’t trigger if the window is opened just a crack.
Motion Sensors: For Large Spaces
Motion sensors are great for large rooms (like a living room or basement) where a door/window sensor might not cover the entire area. They detect movement within a certain range (usually 30-50 feet) and trigger an alert.
I placed one in my basement (a common hiding spot for burglars) and one in my living room. I set them to “away mode” when I’m not home—so if someone breaks in through a window, the motion sensor will alert me. When I’m home, I set them to “home mode,” which ignores small movements (like my dog walking around) but triggers if there’s a large movement (like a burglar).
Avoid placing motion sensors near windows (sunlight can trigger false alerts) or near pets (if you have a large dog, it might trigger the sensor). Look for sensors with “pet immunity” if you have pets over 20 pounds.
Environmental Sensors: Protect Against Disasters (Not Just Intruders)
Home security isn’t just about keeping out burglars—it’s about protecting your home from natural disasters and accidents. These sensors are often overlooked, but they can save you thousands of dollars in repairs.
- Water Leak Sensors: I placed these under my kitchen sink, near my water heater, and in my basement. They detect water and send an alert to my phone—so I can turn off the water before it floods my home. After my pipe burst, this was the first sensor I installed, and it’s already paid for itself (I caught a small leak under my sink last month before it became a big problem).
- Smoke/Carbon Monoxide (CO) Sensors: These are required by law in most states, but don’t just buy the cheap, battery-powered ones. I went with smart smoke/CO sensors that connect to my phone—so if the alarm goes off while I’m at work, I get an alert immediately. They also sync with my security system, so the siren goes off and the monitoring company is notified (if you have professional monitoring).
- Glass Break Sensors: These detect the sound of breaking glass (like a window being smashed) and trigger an alert. I installed them in my living room and dining room, which have large windows. They’re great for homes with big windows that are easy to break into.
Part 4: Professional Monitoring vs. Self-Monitoring—Which Is Right for You?
Once I had all my devices installed, I had to decide: Should I use professional monitoring or self-monitor? Professional monitoring means a company (like SimpliSafe, ADT, or Vivint) watches your home 24/7—if an alert is triggered, they call you, then the police/fire department if you don’t respond. Self-monitoring means you get alerts on your phone, and you’re responsible for calling the authorities.
I went with professional monitoring (SimpliSafe, $24.99/month) for peace of mind. As a busy parent, I don’t always have my phone on me—if a burglar breaks in while I’m in the shower or playing with my kids, I want someone else to handle it. Professional monitoring also often gets you a discount on your homeowner’s insurance (5-20% off), which helps offset the cost.
But self-monitoring is a great option if you’re on a budget. Most security systems let you self-monitor for free or for a small fee ($3-$13/month). It’s perfect if you’re home often or have a neighbor who can check on your house if you get an alert.
Pro Tip: If you choose professional monitoring, make sure the company has a good reputation—read reviews and check their response time (you want a company that responds in under 30 seconds).
Part 5: Bonus Tips—Simple, Low-Cost Ways to Boost Security
You don’t need to spend thousands of dollars to improve your home security. Here are some simple, low-cost things I did that made a big difference:
- Upgrade Your Locks: I replaced all my door locks with deadbolts (the ones with a 1-inch bolt—harder to kick in) and smart locks. Smart locks let me lock/unlock my door from my phone, so I never have to worry if I forgot to lock the door when I left. I also got rid of the “hidden key” under the doormat—burglars know to look there.
- Add Outdoor Lighting: Burglars hate light—they want to stay hidden. I installed motion-activated floodlights (Arlo Pro 3 Floodlight Camera) around my house—when someone walks by, the lights turn on, scaring them away. I also added solar-powered lights along my driveway and walkway for extra visibility at night.
- Trim Your Landscaping: Overgrown bushes and trees are perfect hiding spots for burglars. I trimmed my hedges so they’re not tall enough to hide behind, and I cut back tree branches that hang over my roof (burglars can use them to climb into second-floor windows).
- Use Timers for Lights: When I’m away, I use smart light timers to turn my lights on and off at different times—this makes it look like someone is home. I also set my TV to turn on for an hour in the evening—burglars are less likely to target a house that looks occupied.
- Join a Neighborhood Watch: My neighborhood has a neighborhood watch group, and it’s been a game-changer. We share alerts about suspicious activity, check on each other’s houses when we’re away, and even have a group chat to stay connected. It’s a simple way to build community and boost security.
- Hold Your Mail/Packages: When I go on vacation, I put a hold on my mail with USPS and ask a neighbor to collect any packages. A pile of mail or packages on your porch is a dead giveaway that you’re away.
Part 6: My Final Thoughts—Home Security Is About Peace of Mind, Not Perfection
After my break-in, I spent weeks feeling anxious—every noise in the night made me jump, and I constantly checked my cameras. But as I built my layered security system, that anxiety faded. Now, I can leave my house for work, go on vacation, or let my kids play in the backyard without worrying.
The biggest lesson I learned? Home security isn’t about being perfect—it’s about being prepared. You don’t need every gadget on the market; you just need the right ones for your home and your family. Start with the basics (cameras, doorbell, door/window sensors) and add more as you go. And remember: The best security system is one you’ll actually use—don’t buy something so complicated that you’ll forget to arm it or check the alerts.
If you’re on the fence about improving your home security, ask yourself this: Can you put a price on peace of mind? For me, the answer was no. The small investment I made in cameras, sensors, and a monitoring system has paid off in spades—not just in preventing theft, but in knowing that my family is safe, no matter where I am.
Now, I want to hear from you: What’s your biggest home security concern? Do you have any gadgets or tips that have worked for your family? Leave a comment below—I’d love to hear your thoughts. And if you found this guide helpful, share it with your friends and neighbors—we’re all in this together.