Let’s be real—most of us aren’t living in sprawling mansions with endless square footage. Whether you’re in a cozy apartment in New York City, a compact townhouse in London, or a modest bungalow in Los Angeles, making the most of your living space is a constant battle. I’ve been there: tripping over piles of shoes by the door, struggling to fit all my cookware in a tiny kitchen cabinet, and feeling like my living room was more of a storage unit than a place to relax. Sound familiar?
After years of trial and error, endless Pinterest deep dives, and even a few (okay, many) DIY fails, I finally cracked the code to optimizing my home space. And the best part? It didn’t require a massive budget or a full renovation. From creating efficient storage that actually looks stylish to converting my cramped closed kitchen into an open-concept dream, these are the strategies that changed everything for me. As someone who’s lived in both small urban apartments and suburban homes, I’ve tested these tips across different spaces—and they work for any size, style, or budget. Let’s dive in.
First: Stop Wasting Space—Start Thinking “Vertical” (It’s a Game-Changer)
One of the biggest mistakes I made early on was only using the space at eye level. We’re so used to placing furniture and storage units on the floor that we forget about the entire wall above us—and that’s a goldmine of unused space. I used to have a tiny entryway that was always cluttered with coats, shoes, and my kids’ backpacks. It looked messy, felt cramped, and made coming home feel stressful instead of welcoming. That all changed when I started thinking vertically.
For my entryway, I installed floating shelves from the floor all the way up to the ceiling. I added hooks at shoulder height for coats and bags, a narrow shoe rack at the bottom (with a hidden drawer for small items like keys and sunglasses), and used the upper shelves for decorative baskets that hold seasonal items—think winter scarves in the fall, beach towels in the summer. Suddenly, my entryway went from chaotic to calm, and I had extra floor space for a small bench where we could sit to put on shoes. No more tripping over sneakers, no more coats piling up on the couch. It was a simple change, but it made a huge difference.
This vertical mindset works everywhere in the home. In the bedroom, I swapped my low-profile nightstands for tall, narrow ones with built-in drawers—they take up less floor space but give me twice as much storage for books, phone chargers, and skincare products. In the bathroom, I installed a over-toilet cabinet that goes all the way to the ceiling, storing towels, toilet paper, and cleaning supplies without taking up any extra counter or floor space. Even in the living room, I mounted my TV on the wall and added floating shelves around it for books, remotes, and decor—freeing up the coffee table and making the room feel more open.
Pro tip: When shopping for storage furniture, look for pieces that are tall and narrow instead of short and wide. They’ll give you the same (or more) storage capacity without hogging floor space. And don’t be afraid to go all the way to the ceiling—even if you can’t reach the top shelves, you can use them for items you don’t use often (like holiday decorations or extra linens) and keep a step stool handy for when you need them.
Efficient Storage: It’s Not About More Space—It’s About Smarter Space
I used to think that the only way to fix my storage problems was to get a bigger house. But that’s not realistic for most of us. The truth is, we already have enough space—we’re just not using it efficiently. Over the years, I’ve learned that the best storage solutions are the ones that fit your lifestyle, hide clutter, and blend seamlessly with your decor. No more ugly plastic bins or mismatched baskets—storage can be both functional and stylish.
Kitchen Storage: From Chaos to Calm
The kitchen is where storage chaos hits hardest—especially if you love to cook (like me). I used to have pots and pans stacked so high in my cabinets that I’d knock one over every time I tried to get to the one I needed. My drawers were a jumble of utensils, and my counter was covered in small appliances that I only used once in a while. It was stressful to cook in, and it made the whole room feel cramped.
Here’s what I did to fix it: First, I purged. I got rid of any pots, pans, or utensils that I hadn’t used in a year—if it’s collecting dust, it’s not worth keeping. Then, I invested in a few simple organizers that transformed my cabinets and drawers. For my pots and pans, I installed a vertical pot rack inside my cabinet door—now they hang neatly, and I can grab the one I need without knocking over the rest. For my drawers, I used dividers to separate utensils, measuring cups, and cooking tools—no more digging through a jumble to find a spoon. I also added a pull-out shelf in my lower cabinet for my small appliances (like my toaster and blender)—they’re out of sight but easy to reach when I need them.
Another game-changer? Under-sink storage. I used to have cleaning supplies scattered under my sink, but now I have a tiered organizer that holds all my dish soap, sponges, and cleaning sprays—plus a hidden trash can that fits perfectly under the sink, freeing up floor space. And for my countertop, I only keep the appliances I use every day (my coffee maker and air fryer) and store the rest in the pull-out shelf. My counter is now clear, and my kitchen feels bigger and more inviting.
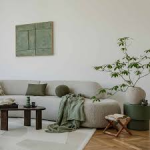
Living Room Storage: Hide Clutter, Keep Style
The living room is where we spend most of our time, so it’s important that it feels cozy and uncluttered—but it’s also where clutter tends to accumulate (think remote controls, kids’ toys, blankets, and books). I used to have a coffee table that was always covered in junk, and my bookshelf was a disorganized mess. Then I made a few simple changes to hide the clutter without sacrificing style.
First, I swapped my regular coffee table for one with built-in storage. It has a lift-top that opens up to store remotes, magazines, and coasters, and the bottom shelf holds blankets and throw pillows. Now my coffee table is always clear, and I have a place for everything. For my bookshelf, I used a mix of open and closed storage—open shelves for books and decor, and closed cabinets at the bottom for kids’ toys and other items I don’t want to display. I also used baskets on the open shelves to corral small items like candles and photo frames, keeping everything neat and organized.
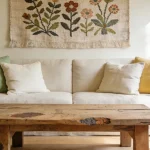
If you don’t have a lot of floor space for a bookshelf, wall-mounted shelves are a great option. I added a few floating shelves above my couch for books and decor, which freed up floor space and added visual interest to the room. And for blankets and throw pillows, I keep them in a stylish basket in the corner—easy to grab when I want to get cozy, but out of the way when I don’t.
Bedroom Storage: Maximize Space Without Sacrificing Comfort
The bedroom should be a sanctuary, but it’s hard to relax when your clothes are piling up and your nightstand is cluttered. I used to have a queen-sized bed with a low frame that wasted all the space underneath. Now, I have a platform bed with built-in drawers—four large drawers under the bed that hold extra linens, seasonal clothes, and my kids’ outgrown clothes. It’s a game-changer—no more plastic bins under the bed, and my bedroom feels much cleaner.
For my closet, I installed double hanging rods—one for shorter items like shirts and blouses, and one for longer items like dresses and pants. This doubled my hanging space, and I no longer have to cram my clothes together. I also added shelf dividers to keep my sweaters and folded clothes neat, and I used hanging organizers for my shoes and accessories. Now, I can find everything I need in seconds, and my closet feels spacious and organized.
Pro tip: Use every inch of your closet—even the door. I installed a hanging organizer on the back of my closet door for belts, scarves, and jewelry, which freed up drawer space and kept my accessories organized. It’s a small change, but it makes a big difference.
Open-Concept Kitchen: Why It’s Worth the Hype (And How to Do It Without a Full Renovation)
If there’s one home trend that’s stuck around (and for good reason), it’s the open-concept kitchen. I used to have a closed-off kitchen that felt dark and cramped—when I was cooking, I couldn’t keep an eye on my kids in the living room, and it was hard to host guests because the kitchen felt separate from the rest of the house. So, I decided to convert it to an open-concept, and it’s the best decision I ever made for my home.
First, let’s talk about why open-concept works for so many people. It makes small spaces feel bigger by removing walls that divide rooms, it allows for better flow between the kitchen and living area (perfect for hosting or keeping an eye on kids), and it lets natural light flow through the space, making it brighter and more inviting. But I know what you’re thinking—renovations are expensive, and removing walls sounds scary. The good news? You don’t have to do a full renovation to get the open-concept feel.
My Open-Concept Hack: Remove a Non-Load-Bearing Wall (Or Fake It)
First, I consulted a contractor to make sure the wall between my kitchen and living room was non-load-bearing (this is crucial—never remove a load-bearing wall without professional help). Once we confirmed it was safe, we removed the wall, and the difference was night and day. Suddenly, my kitchen felt twice as big, and I could cook while chatting with my family in the living room. But if you can’t remove a wall (or don’t want to), there are ways to fake the open-concept feel.
One option is to remove just a portion of the wall—like creating a pass-through or a breakfast bar. This allows for flow between the kitchen and living area without removing the entire wall. Another option is to use glass doors or a sliding door to separate the kitchen from the living room—when the doors are open, it feels open-concept, and when they’re closed, you can have privacy (perfect for when you’re cooking something smelly).
Designing an Open-Concept Kitchen That’s Functional (And Stylish)
When you’re converting to an open-concept kitchen, it’s important to make sure it’s still functional. Here’s what I did to balance style and function:
- Create a focal point: Since the kitchen is now visible from the living room, I wanted it to look cohesive with the rest of the space. I installed a sleek backsplash that matches the decor in my living room, and I chose countertop materials that complement my furniture. This makes the space feel unified, not disjointed.
- Add a kitchen island: A kitchen island is a must for open-concept spaces—it provides extra counter space, storage, and can even act as a breakfast bar. I got a small island with built-in drawers for storage and stools on one side, so my family can eat breakfast or chat while I cook. It’s become the heart of the home.
- Keep storage hidden: Since the kitchen is open, you don’t want clutter to be visible. I made sure to have plenty of closed storage (cabinets and drawers) to hide pots, pans, and other kitchen items. I also used decorative baskets on the island to hold fruit and other small items, keeping them within reach but looking neat.
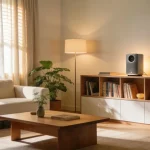
- Light it up: Open-concept spaces need good lighting to feel warm and inviting. I added recessed lighting in the kitchen, pendant lights above the island, and table lamps in the living room—this creates layers of light and makes the space feel cozy, even in the evening.
The best part about my open-concept kitchen? It’s made hosting so much easier. When I have friends over, I can cook in the kitchen while everyone hangs out in the living room—no more feeling isolated in the kitchen. And it’s perfect for my family: I can cook dinner while my kids do homework at the island, or watch TV while I prep meals. It’s made our home feel more connected, and that’s priceless.
Small Space Hacks: For When You’re Short on Square Footage
Even if you can’t do a major renovation or install new storage, there are small, affordable hacks that can make a big difference in your space. Here are my go-to tips for small homes:
1. Use Multi-Functional Furniture
Multi-functional furniture is a small space’s best friend. I have a sofa bed in my living room that doubles as a guest bed when friends or family come to visit—no need for a separate guest room. I also have a dining table that folds down when I’m not using it, freeing up floor space. Other great options: ottomans with storage (perfect for hiding blankets and toys), and coffee tables that can be raised to dining table height.
2. Declutter Regularly
Clutter is the enemy of small spaces. I make it a habit to declutter every few months—going through my clothes, kitchen items, and decor to get rid of anything I don’t use or love. If you haven’t used something in a year, it’s time to let it go. You’ll be surprised how much more space you have when you get rid of the excess.
3. Use Mirrors to Make the Space Feel Bigger
Mirrors are a simple trick to make any space feel larger and brighter. I hung a large mirror on the wall in my living room, opposite the window—it reflects natural light and makes the room feel twice as big. You can also use small mirrors in the bathroom or bedroom to add depth and light.
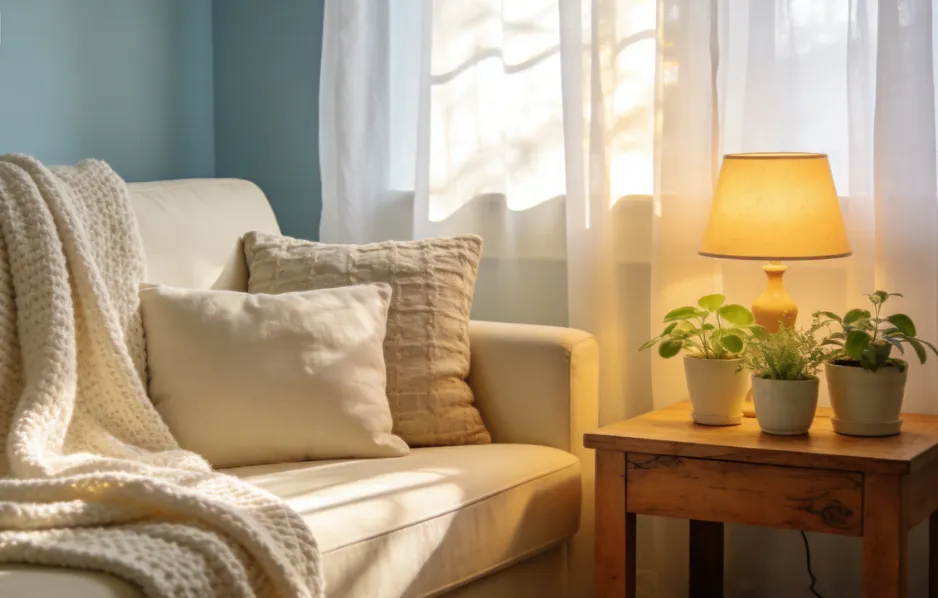
4. Choose Light Colors
Dark colors can make small spaces feel cramped and gloomy. I painted my walls a light, neutral color (off-white and soft gray) and used light-colored furniture and decor. This reflects light and makes the space feel open and airy. You can add pops of color with pillows, blankets, and decor—just keep the main elements light.
Final Thoughts: Your Home Should Work for You
At the end of the day, optimizing your home space isn’t about following trends or having a perfect, Instagram-worthy home—it’s about making your space work for you and your family. Whether you’re focusing on efficient storage, creating an open-concept kitchen, or just adding a few small hacks to make your space feel bigger, the goal is to create a home that feels calm, organized, and welcoming.
I’ve been where you are—frustrated with a cramped, cluttered home that didn’t feel like a sanctuary. But with these tips, I transformed my space into something that works for my family’s lifestyle, and I know you can too. You don’t need a big budget or a lot of time—start small, make one change at a time, and see how it impacts your space. Before you know it, you’ll have a home that feels bigger, brighter, and more functional.
What’s your biggest space-related struggle? Let me know in the comments—I’d love to share more tips tailored to your needs. And if you’ve already transformed your home, share your favorite hacks below—I’m always looking for new ideas!