Hi everyone! If you’re like me, you love giving your home a fresh, new look without breaking the bank. Let’s be real—hiring a decorator or buying brand-new furniture can cost a fortune, and where’s the fun in that? I’m a total DIY enthusiast, and over the years, I’ve learned that some of the best home upgrades come from rolling up your sleeves, grabbing a few supplies, and putting your own personal touch on things. Today, I’m sharing three of my go-to DIY home decor projects that are perfect for beginners, require minimal tools, and will make your space feel cozy, stylish, and totally you. Whether you’re looking to spruce up an old piece of furniture, add some personality to a blank wall, or even make your own curtains (yes, it’s easier than you think!), these projects have got you covered. Let’s dive in!
Project 1: Refinish Old Furniture with a Fresh Coat of Paint (No Sanding Required!)
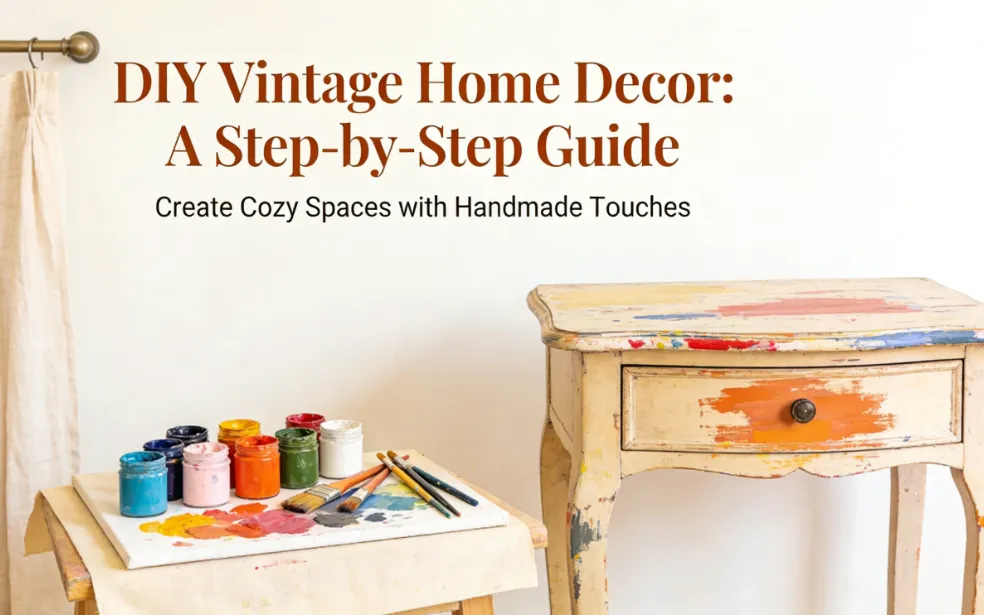
First up: refinishing old furniture. We’ve all been there—you find a beat-up chair at a thrift store, inherit a dated dresser from a family member, or just get tired of the worn-out look of your current coffee table. Instead of tossing it out or spending hundreds on a new one, a fresh coat of paint can transform it into a statement piece. I recently refinished an old wooden side table I found at Goodwill for $15, and it’s now one of my favorite pieces in my living room. The best part? You don’t even need to sand it (unless you want to, but trust me—this method works without it!).
What You’ll Need:
- Old furniture piece (dresser, chair, table, etc.)
- Degreaser or mild soap and water
- Microfiber cloths
- Primer (I recommend a bonding primer—no sanding needed! My go-to is Kilz Adhesion Primer)
- Latex paint (choose a color that fits your decor—neutral tones like white, gray, or beige are timeless, but don’t be afraid to go bold with navy, sage, or even a soft pink!)
- Paintbrushes (a 2-inch angled brush for edges and a foam roller for large surfaces)
- Clear topcoat (optional, but recommended for high-traffic pieces—polyurethane or acrylic sealer works great)
Step-by-Step Instructions:
- Clean the Furniture: First, you need to get rid of any dirt, grease, or dust on the surface. Mix a little mild soap with warm water (or use a degreaser if the piece is really grimy) and wipe it down with a microfiber cloth. Let it dry completely—this is super important because paint won’t stick to a damp surface. I usually let mine dry overnight to be safe.
- Apply the Primer: Once the furniture is dry, it’s time to prime. Shake the primer well and pour a little into a paint tray. Use the angled brush to paint the edges and hard-to-reach areas, then use the foam roller for the flat surfaces. Apply a thin, even coat—you don’t want to glob it on. Let the primer dry for 1-2 hours (check the label on your primer for exact drying time).
- Paint the Furniture: After the primer is dry, it’s time for the fun part—painting! Stir your paint thoroughly (latex paint can separate, so don’t skip this step). Apply the first coat the same way you applied the primer: brush for edges, roller for flats. Again, thin coats are better—thick coats will drip and take longer to dry. Let the first coat dry for 2-4 hours, then apply a second coat. Most pieces will need 2 coats, but if you’re using a lighter color over a dark surface, you might need a third.
- Add a Topcoat (Optional): If your furniture is going to get a lot of use (like a coffee table or chair), a clear topcoat will protect the paint from scratches and wear. Apply it the same way you applied the paint—thin, even coats—and let it dry completely (usually 4-6 hours). I like to use a water-based polyurethane because it’s easy to clean up and doesn’t have a strong odor.
- Enjoy Your New Piece! Once everything is dry, your furniture is ready to use! I added new hardware (knobs and pulls) to my side table to give it an extra upgrade—you can find affordable hardware at Home Depot or Amazon. This project takes about a day (including drying time), and the results are amazing. You’ll be shocked at how a little paint can turn something old and worn into something beautiful.
Pro Tip: If you want a distressed look (super popular in farmhouse and cottage-style decor), lightly sand the edges of the furniture after the final coat of paint dries. Use a fine-grit sandpaper and sand gently—you don’t want to remove too much paint. Wipe away the sanding dust with a microfiber cloth, and you’re done!
Project 2: DIY Wall Art—No Art Skills Required!
Next up: wall decor. Blank walls can make a room feel cold and boring, but buying art can be expensive—especially if you want something that fits your style. The good news? You can make your own wall art with simple supplies, and you don’t need to be a professional artist. I’ve made several pieces for my home, and they always get compliments. My favorite DIY wall art project is easy, affordable, and customizable—perfect for any room in your house.
What You’ll Need:
- Canvas (I use 16×20 inch canvases—they’re a great size for most walls, and you can find them at Michaels or Hobby Lobby for $5-$10 each)
- Acrylic paint (choose 2-3 colors that complement your decor—neutral colors, pastels, or bold hues all work!)
- Paintbrushes (a large flat brush for background, a small round brush for details)
- Painter’s tape (optional, for clean lines)
- Sponge (optional, for texture)
- Pencil (optional, for sketching a design)
Step-by-Step Instructions (3 Easy Styles to Choose From):
Style 1: Abstract Color Block (Perfect for Modern Decor)
- Prep the Canvas: If your canvas is unprimed, you can apply a thin coat of white acrylic paint to the entire surface and let it dry—it will help the colors pop. If it’s already primed, you can skip this step.
- Use Painter’s Tape to Create Blocks: Decide how you want to divide your canvas (vertical, horizontal, diagonal—get creative!). Apply painter’s tape to the canvas to create clean lines between the blocks. Make sure the tape is pressed down firmly so paint doesn’t seep under it.
- Paint the Blocks: Use a large flat brush to paint each block with your chosen colors. Apply 2 thin coats (letting each coat dry for 1-2 hours) to make sure the color is vibrant. I like to mix a little white paint with my colors to make them lighter and softer, but you can use them straight from the tube too.
- Remove the Tape: Once the final coat of paint is dry to the touch (about 1 hour), carefully remove the painter’s tape. Pull it at a 45-degree angle to avoid peeling the paint. If there are any small gaps or uneven lines, use a small round brush to touch them up.
Style 2: Minimalist Brush Strokes (Great for Scandi or Boho Decor)
- Prep the Canvas: Same as above—prime if needed.
- Sketch (Optional): If you want to plan your brush strokes, lightly sketch them on the canvas with a pencil. You can do simple horizontal or vertical strokes, or go for a more organic, wavy look.
- Paint the Strokes: Dip your large flat brush in paint and make bold, even strokes on the canvas. Don’t worry about being perfect—imperfections make it look more authentic. You can use one color or multiple colors—mix and match to fit your style. Let each stroke dry for 1-2 hours, then add more strokes if you want.
Style 3: Textured Sponge Art (Ideal for Cozy, Rustic Decor)
- Prep the Canvas: Prime if needed.
- Apply a Base Coat: Paint the entire canvas with a light base color (white, cream, or light gray) and let it dry completely.
- Add Texture with a Sponge: Dip a sponge in a darker color (sage green, navy, or taupe work great) and dab it lightly on the canvas. Start with a light touch—you can always add more. Move the sponge in random directions to create a natural, textured look. Let it dry for 1-2 hours, then add a second layer if you want more depth.
Once your wall art is dry, you can hang it up using picture hangers or command strips (no nails needed!). I like to group 2-3 pieces together for a gallery wall—they look great in the living room, bedroom, or even the kitchen. The best part? You can customize the colors and style to match your home, and it costs a fraction of what store-bought art costs.
Pro Tip: If you’re feeling extra creative, add some details to your wall art—like gold leaf accents, stencils, or even handwritten quotes. You can find stencils at craft stores or print your own from the internet. A little gold leaf goes a long way and adds a touch of elegance!
Project 3: DIY Curtains—Easier Than You Think (No Sewing Machine Needed!)
Last but not least: DIY curtains. Curtains can make a huge difference in a room—they add privacy, block light, and add texture and color. But store-bought curtains can be expensive, especially if you have large windows. I recently made curtains for my bedroom and living room, and it took me less than an hour per pair. The best part? You don’t even need a sewing machine—you can use fabric glue or iron-on hem tape (no sewing skills required!).
What You’ll Need:
- Fabric (choose a fabric that fits your decor—cotton, linen, or canvas work great. Measure your window first: the fabric should be 2-2.5 times the width of your window (for fullness) and the length should be from the top of your curtain rod to where you want the curtains to end (add 4-6 inches for hems).
- Iron-on hem tape (my go-to is Heat ‘n Bond—you can find it at craft stores or Amazon)
- Iron and ironing board
- Scissors (fabric scissors work best, but regular scissors will work too)
- Tape measure
- Pencil or fabric marker
- Curtain rod and curtain rings (optional, but recommended for easy hanging)
Step-by-Step Instructions:
- Measure and Cut the Fabric: First, measure your window. Let’s say your window is 36 inches wide and you want the curtains to be 84 inches long. You’ll need fabric that’s 72-90 inches wide (2-2.5 times the window width) and 88-90 inches long (adding 4-6 inches for hems). Lay the fabric flat on a clean surface, measure it with a tape measure, and mark the dimensions with a pencil or fabric marker. Cut the fabric along the marks—make sure the cuts are straight (you can use a ruler to guide you).
- Hem the Sides: Fold the sides of the fabric in 1 inch, then fold them in another 1 inch (so the raw edge is hidden). Press the fold with an iron to make it crisp. Cut a piece of iron-on hem tape to fit the length of the side, place it between the folded fabric, and iron it according to the package instructions (usually 10-15 seconds). This will bond the hem together—no sewing needed!
- Hem the Bottom: Do the same for the bottom of the curtains. Fold the fabric up 2 inches, then fold it up another 2 inches (for a 4-inch hem). Press with an iron, add the hem tape, and iron to bond. The bottom hem should be thicker than the side hems to help the curtains hang nicely.
- Create the Curtain Rod Pocket: Now, you need to create a pocket at the top of the curtains so you can slide them onto the curtain rod. Fold the top of the fabric down 3 inches, then fold it down another 3 inches (for a 3-inch pocket). Press with an iron, add the hem tape, and iron to bond. Make sure the pocket is wide enough to fit your curtain rod—measure your rod first to be safe.
- Hang the Curtains: Slide the curtain rod through the pocket, hang the rod on the brackets, and you’re done! If you want to use curtain rings instead of a rod pocket, you can skip the top hem and attach curtain clips to the top of the curtains. Curtain clips are easy to use and add a modern touch.
I love DIY curtains because you can choose any fabric you want—print, solid, textured, whatever fits your style. I used a light linen fabric for my bedroom curtains (it lets in soft light) and a bold printed fabric for my living room (it adds a pop of color). They look just as good as store-bought curtains, but they cost a fraction of the price. And since you’re making them yourself, you can customize the length and width to fit your windows perfectly—no more ill-fitting curtains!
Pro Tip: If you want to add a little extra flair, you can add trim to the bottom of the curtains. Cut a piece of trim to the length of the curtains, attach it with iron-on hem tape, and iron it in place. Trim adds a nice detail and makes the curtains look more polished.
Final Thoughts
DIY home decor is all about having fun, being creative, and making your space feel like yours. These three projects are perfect for beginners—they’re easy, affordable, and require minimal tools. Whether you’re refinishing old furniture, making your own wall art, or sewing (or gluing!) curtains, you’ll be proud of the results. And the best part? You’ll save money while giving your home a fresh, new look. I hope these tutorials inspire you to get creative and start DIY-ing your space. Let me know in the comments which project you’re going to try first—I’d love to see your results!
P.S. If you loved these DIY projects, be sure to check out my other posts for more easy home decor ideas, budget-friendly tips, and step-by-step tutorials. And don’t forget to share this post with your friends—they’ll thank you for the inspiration!