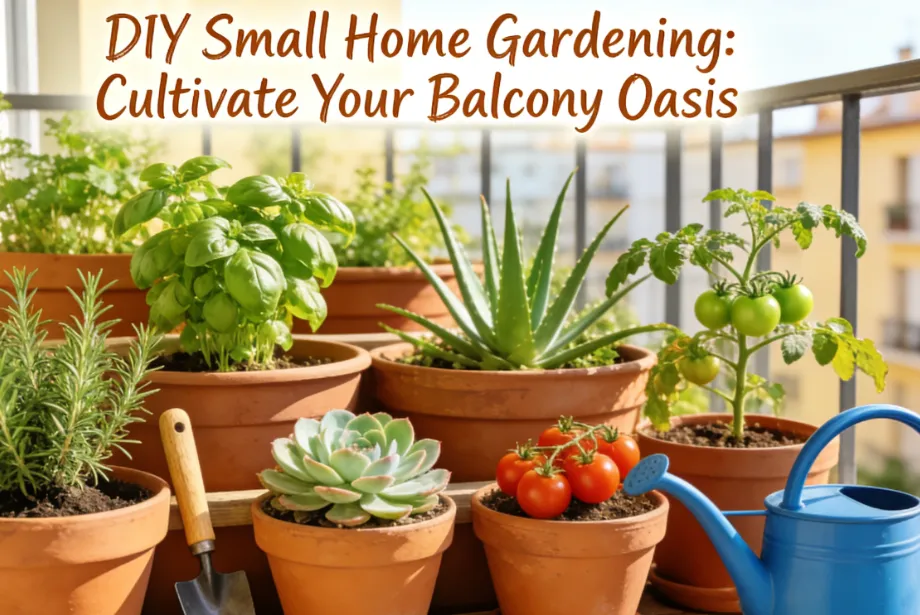
Hi there, fellow plant lovers (and future plant parents)! If you’ve been scrolling through Instagram or Pinterest lately, you’ve probably noticed those dreamy small home gardens—sunny windowsills lined with succulents, tiny balcony herb patches, or even a corner of your living room transformed into a lush, green escape. And if you’re thinking, “That looks amazing, but I don’t have a green thumb… or a lot of space… or a clue where to start,” let me tell you: I’ve been there. A few years ago, I could kill a cactus (yes, really) and thought “indoor gardening” was just a fancy term for people with more time and patience than me. But today? My small apartment is filled with thriving plants, and my tiny balcony is my go-to spot for morning coffee and fresh herbs. The best part? It’s all DIY, budget-friendly, and totally doable—even for beginners.
In this guide, I’m going to walk you through everything you need to know to create your own small home garden, whether you’re working with a windowsill, a balcony, a tiny backyard, or even just a shelf. I’ll share my favorite easy-to-grow plants (including some unique, eye-catching ones that will make your friends ask, “Where did you get that?”), step-by-step instructions for setting up your garden, and all the tips and tricks I’ve learned along the way to keep your plants happy and healthy. No fancy tools, no expensive supplies, no green thumb required—just a little curiosity and a willingness to get your hands dirty (in the best way possible).
First: Why a Small Home Garden? (Spoiler: It’s Not Just About the Plants)
Before we dive into the “how,” let’s talk about the “why.” I started my DIY garden because I wanted to bring a little bit of nature into my busy city life. Living in a small apartment in Chicago, I rarely got to see greenery outside my window—unless you count the tree across the street that loses its leaves every winter. But what I didn’t expect was how much my garden would change my daily routine. Waking up to water my plants, checking for new growth, and even just sitting next to them while I work has become a form of self-care. It’s calming, it’s rewarding, and it’s a great way to disconnect from screens and connect with something living.
And let’s not forget the practical benefits: Fresh herbs for cooking (there’s nothing better than plucking a basil leaf straight from the plant to add to your pasta), cleaner air (plants are natural air purifiers—win-win!), and a boost to your mood. Studies have shown that having plants in your home can reduce stress, improve focus, and even help you sleep better. Plus, a small garden is a great way to express your personal style—whether you love modern minimalism, bohemian vibes, or a rustic cottage feel, you can customize your garden to fit your home.
For my fellow renters: Don’t worry! You don’t need to have a yard or be able to drill holes in the walls to create a beautiful garden. Most of the ideas I’m sharing are renter-friendly, so you can take your plants with you when you move (and avoid losing your security deposit).
Step 1: Choose Your Space (Size Doesn’t Matter—Promise!)
The first step to creating your DIY small home garden is figuring out where you’re going to put it. The best part about small gardens is that they can fit almost anywhere—you just need to work with the space you have. Here are some common spaces and how to make the most of them:
Windowsills: The Perfect Indoor Spot
If you don’t have a balcony or backyard, windowsills are your best friend. Look for windows that get at least 4-6 hours of sunlight a day (south-facing windows are ideal, but east or west-facing will work too). You can fit a surprising number of plants on a windowsill—just use stackable planters, hanging pots, or small terracotta pots to maximize space. I have a south-facing windowsill in my kitchen that’s home to my herb garden (basil, mint, parsley) and a few small succulents, and it’s only about 2 feet wide!
Pro tip: If your windowsill is narrow, use wall-mounted planters above the window to add more greenery without taking up valuable space. Just make sure they’re securely mounted (renters can use command strips to avoid holes).
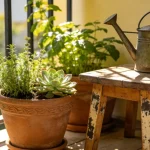
Balconies: Small Outdoor Oases
Even a tiny balcony (think 4×6 feet) can be transformed into a cozy garden. The key here is vertical gardening—using wall space, hanging planters, and tiered stands to make the most of the area. I have a small balcony in my apartment, and I use a tiered plant stand for my larger plants (like a pothos and a snake plant), hanging baskets for trailing plants (like string of pearls), and a small raised planter box for my vegetables (tomatoes and peppers—yes, you can grow veggies on a balcony!).
Pro tip: Make sure your balcony can support the weight of your plants and planters. Most balconies can handle small to medium-sized planters, but avoid putting heavy pots on railings (safety first!). Also, check with your landlord to make sure you’re allowed to hang planters or install wall-mounted fixtures.
Shelves & Corners: Indoor Green Nooks
If you don’t have a sunny windowsill, don’t panic! There are plenty of shade-loving plants that thrive in low-light areas, like snake plants, pothos, and ZZ plants. You can create a small garden on a bookshelf, a side table, or even in a corner of your living room using a few small pots and a plant stand. I have a corner in my bedroom with a tall plant stand that holds my snake plant and a ZZ plant, and it adds so much life to the room—even though it only gets indirect light.
Pro tip: Use a grow light if your space is really dark. Grow lights are affordable, easy to set up, and can help your plants thrive even in areas with no natural light. I use a small LED grow light for my shade-loving plants, and it makes a huge difference.
Step 2: Choose Your Plants (Easy-to-Grow & Unique Picks for Beginners)
Now comes the fun part: picking your plants! As a beginner, it’s important to start with plants that are low-maintenance and forgiving—no need to jump into finicky plants that require constant attention. Below, I’ve rounded up my favorite easy-to-grow plants, plus a few unique, eye-catching ones that will make your garden stand out. I’ve also included tips on how to care for each one, so you can keep them thriving.
Indoor Plants (Perfect for Windowsills & Shelves)
1. Succulents & Cacti: The Ultimate Low-Maintenance Plants
If you’re a total beginner, succulents and cacti are your best bet. They’re drought-tolerant, so you don’t have to water them very often (once every 1-2 weeks is usually enough), and they come in a variety of shapes, sizes, and colors. Some of my favorites include:
- Echeveria: A rosette-shaped succulent with thick, fleshy leaves that come in shades of green, pink, and purple. It’s perfect for windowsills and looks great in small terracotta pots.
- String of Pearls: A trailing succulent with tiny, round leaves that look like pearls. It’s great for hanging planters and adds a whimsical touch to any space.
- Barrel Cactus: A classic cactus with a round, barrel shape. It’s slow-growing and requires almost no maintenance—just make sure it gets plenty of sunlight.
Care tip: Succulents and cacti need well-draining soil (you can buy cactus soil at any garden center) and plenty of sunlight. Water them only when the soil is completely dry—overwatering is the number one way to kill them (trust me, I’ve done it).
2. Pothos: The Trailblazer of Indoor Plants
Pothos is another great plant for beginners. It’s a trailing plant with heart-shaped leaves that come in a variety of variegations (green and white, green and yellow, etc.). It’s extremely forgiving—even if you forget to water it for a few weeks, it will bounce back. Pothos can grow in low light or bright, indirect light, so it’s perfect for any room in your home.
Care tip: Water pothos when the top inch of soil is dry. It can also be grown in water—just put a cutting in a glass of water and change the water every week or so. Pothos is also a great air purifier, so it’s perfect for bedrooms and living rooms.
3. Snake Plant (Sansevieria): The “Indestructible” Plant
If you’re worried about killing plants, the snake plant is for you. It has long, sword-shaped leaves that are green with yellow edges, and it can survive in almost any conditions—low light, bright light, infrequent watering, you name it. It’s also a great air purifier, removing toxins like formaldehyde and benzene from the air.
Care tip: Water snake plants only when the soil is completely dry (usually once every 2-3 weeks). They don’t like to be overwatered, so make sure the pot has drainage holes.
4. Unique Indoor Plant: Air Plant (Tillandsia)
If you want a plant that’s a little out of the ordinary, air plants are a great choice. They don’t need soil—they absorb water and nutrients through their leaves—so they can be displayed in all kinds of creative ways: in glass globes, on driftwood, in hanging planters, or even on a shelf with a small dish. Air plants come in a variety of shapes and sizes, and they’re surprisingly easy to care for.
Care tip: Mist your air plant with water 2-3 times a week, or soak it in water for 10-15 minutes once a week (make sure to shake off excess water afterward to prevent rot). They need bright, indirect light—avoid direct sunlight, which can burn their leaves.
Outdoor Plants (Perfect for Balconies & Small Backyards)
1. Herbs: Fresh Flavors Right at Your Fingertips
Herbs are a great addition to any small outdoor garden—they’re easy to grow, they smell amazing, and you can use them in cooking. Some of the easiest herbs to grow are:
- Basil: A warm-weather herb that loves sunlight. It’s perfect for pesto, pasta, and salads. Plant it in a sunny spot and water it regularly (keep the soil moist but not soggy).
- Mint: A fast-growing herb that can be grown in pots (to prevent it from taking over your garden). It’s great for cocktails, tea, and salads. Mint likes partial shade and moist soil.
- Parsley: A hardy herb that grows well in both sun and partial shade. It’s perfect for garnishes, soups, and sauces. Water it regularly to keep the soil moist.
Care tip: Most herbs need at least 6 hours of sunlight a day. Plant them in well-draining soil, and water them when the top inch of soil is dry. You can also bring them indoors during the winter if you live in a cold climate.
2. Small Vegetables: Grow Your Own Food (Even in a Tiny Space)
You don’t need a big backyard to grow vegetables—you can grow plenty of small vegetables in pots on your balcony or windowsill. Some of my favorites include:
- Cherry Tomatoes: Compact varieties like “Patio Baby” or “Sweet Million” grow well in pots. They need plenty of sunlight (at least 6 hours a day) and support (a small trellis or stake).
- Peppers: Bell peppers and chili peppers grow well in pots. They need sunlight and regular watering, and they’ll produce fruit all summer long.
- Lettuce & Spinach: These leafy greens grow quickly and can be grown in shallow pots. They like partial shade (especially in hot climates) and moist soil.
Care tip: Vegetables need more water than herbs or succulents—keep the soil moist but not soggy. Fertilize them every 2-3 weeks with a balanced fertilizer to help them grow.
3. Unique Outdoor Plant: Lavender
Lavender is a beautiful, fragrant plant that’s perfect for small outdoor gardens. It has purple flowers that bloom in the summer, and it’s drought-tolerant, so it’s easy to care for. Lavender is also great for attracting bees and butterflies, which is good for the environment.
Care tip: Lavender needs plenty of sunlight (at least 6 hours a day) and well-draining soil. Water it only when the soil is dry—overwatering can cause root rot. You can also harvest the flowers to make lavender sachets or add to tea.
Step 3: Gather Your Supplies (Budget-Friendly & Easy to Find)
You don’t need to spend a lot of money on supplies to create your DIY small home garden. Most of the things you need can be found at your local garden center, hardware store, or even dollar store. Here’s a list of essential supplies:
Pots & Planters
The type of pot you choose depends on your space and the type of plant you’re growing. Here are some options:
- Terracotta Pots: These are affordable, breathable, and perfect for succulents, herbs, and small vegetables. They come in a variety of sizes, and you can even paint them to match your decor (a fun DIY project!).
- Hanging Planters: Great for trailing plants like pothos and string of pearls. You can find hanging planters made of macramé, ceramic, or plastic—choose one that fits your style.
- Stackable Planters: Perfect for windowsills and balconies—they save space and allow you to grow multiple plants in one area.
- Upcycled Containers: Get creative! You can use old mason jars, tin cans, coffee mugs, or even plastic bottles as planters. Just make sure to drill drainage holes in the bottom (if they don’t have them already) to prevent water from pooling.
Soil & Fertilizer
- Potting Soil: Choose a high-quality potting soil that’s well-draining. For succulents and cacti, use cactus soil (it has more sand and perlite to improve drainage). For herbs and vegetables, use a potting soil that’s rich in organic matter.
- Fertilizer: Most plants don’t need fertilizer right away, but after a few months, you can start fertilizing them to help them grow. For herbs and vegetables, use a balanced organic fertilizer (like fish emulsion or compost). For succulents and cacti, use a fertilizer specifically designed for them (diluted to half strength).
Tools & Other Supplies
- Trowel: A small trowel is essential for planting and repotting plants.
- Watering Can: Choose a small watering can with a narrow spout to make it easy to water your plants without making a mess.
- Drainage Materials: If your pots don’t have drainage holes, you can add gravel or perlite to the bottom to improve drainage.
- Grow Light (optional): If you’re growing plants in a low-light area, a grow light is a great investment.
Pro tip: Shop for supplies at the end of the season (late summer/early fall) to get great deals on pots, soil, and plants. You can also check Facebook Marketplace or Craigslist for secondhand planters and tools—people often give away perfectly good supplies for free or cheap.
Step 4: Set Up Your Garden (Step-by-Step Guide)
Now that you have your space, plants, and supplies, it’s time to set up your garden! Follow these steps to ensure your plants get off to a great start:
Step 4.1: Prepare Your Pots
First, make sure your pots have drainage holes. If they don’t, drill 2-3 small holes in the bottom (use a drill bit designed for ceramic or plastic—be careful not to break the pot). Then, add a layer of gravel or perlite to the bottom of the pot (about 1-2 inches) to improve drainage. This will prevent water from pooling at the bottom of the pot and causing root rot.
Step 4.2: Add Soil
Add potting soil to the pot, leaving about 1 inch of space at the top (this will make it easier to water your plants without spilling soil). If you’re planting succulents or cacti, use cactus soil; for herbs and vegetables, use regular potting soil. Gently press the soil down to remove any air pockets.
Step 4.3: Plant Your Plants
Take your plant out of its nursery pot (be gentle—you don’t want to damage the roots). If the roots are tightly packed (root-bound), gently loosen them with your fingers to help them grow. Place the plant in the center of the pot, making sure the top of the root ball is level with the top of the soil. Then, add more soil around the plant, pressing it down gently to hold the plant in place.
Pro tip: Don’t plant your plants too deep—this can cause the stem to rot. The top of the root ball should be just above the soil line.
Step 4.4: Water Your Plants
After planting, give your plants a good drink of water. Water them until the water drains out of the bottom of the pot—this ensures that the soil is evenly moist and the roots get enough water. Be careful not to overwater, though—succulents and cacti only need a small amount of water, while herbs and vegetables need more.
Step 4.5: Arrange Your Garden
Now it’s time to arrange your plants in your chosen space. For windowsills, place taller plants in the back and shorter plants in the front to maximize sunlight. For balconies, use tiered stands and hanging planters to save space. For shelves, arrange plants of different heights to create visual interest. Don’t be afraid to experiment—you can always rearrange them later if you don’t like the way they look.
Step 5: Care for Your Garden (Keep Your Plants Happy & Thriving)
The key to a successful small home garden is consistent care. But don’t worry—it’s not as time-consuming as you might think. Here are some essential care tips to keep your plants healthy:
Watering: The Most Important (and Tricky) Part
Overwatering is the number one mistake beginners make—so it’s important to water your plants only when they need it. Here’s how to tell when your plants need water:
- Stick your finger into the soil—if the top inch is dry, it’s time to water.
- Succulents and cacti: Water once every 1-2 weeks (or when the soil is completely dry).
- Herbs and vegetables: Water once every 2-3 days (or when the top inch of soil is dry)—they need more water than succulents.
- Indoor plants (pothos, snake plant): Water once a week (or when the top inch of soil is dry).
Pro tip: Water your plants in the morning—this gives the water time to soak into the soil before the sun gets too hot, which prevents evaporation. Avoid watering in the evening, as this can lead to mold and mildew.
Sunlight: Give Your Plants the Light They Need
Most plants need sunlight to grow, but the amount of sunlight they need varies. Here’s a quick guide:
- Full sun: 6+ hours of direct sunlight a day (succulents, cacti, herbs, vegetables).
- Bright, indirect light: 4-6 hours of sunlight a day (pothos, string of pearls, air plants).
- Low light: 2-4 hours of sunlight a day (snake plant, ZZ plant).
If your plants aren’t getting enough light, they’ll start to look leggy (long, thin stems with few leaves) or their leaves will turn yellow. If this happens, move them to a sunnier spot or use a grow light.
Pruning & Deadheading: Keep Your Plants Looking Their Best
Pruning is important for keeping your plants healthy and looking neat. Here’s how to prune different types of plants:
- Herbs: Pinch off the top leaves to encourage bushier growth. This also helps prevent them from flowering (once herbs flower, their leaves become bitter).
- Trailing plants (pothos, string of pearls): Trim the stems to keep them from getting too long. You can use the cuttings to propagate new plants (see below!).
- Flowering plants (lavender): Deadhead (remove dead flowers) to encourage more blooms.
Propagation: Grow More Plants for Free
One of the best things about gardening is propagation—growing new plants from cuttings of your existing plants. It’s easy, free, and a great way to expand your garden. Here’s how to propagate some common plants:
- Pothos: Take a cutting with 2-3 leaves and a node (the bump where the leaf meets the stem). Remove the bottom leaf, then place the cutting in a glass of water. Change the water every week, and roots will start to grow in 2-3 weeks. Once the roots are 1-2 inches long, plant the cutting in soil.
- Succulents: Take a leaf cutting (gently twist a leaf off the plant), then let it dry for 1-2 days (this helps the cut heal). Place the leaf on top of cactus soil, and water it lightly once a week. Roots will start to grow in a few weeks, and a new plant will form.
- Herbs: Take a cutting with 4-6 inches of stem, remove the bottom leaves, and place the cutting in a glass of water. Roots will grow in 1-2 weeks, then you can plant it in soil.
Dealing with Pests & Problems
Even the best gardens can have pests, but don’t panic—most pests are easy to get rid of with natural solutions. Here are some common pests and how to handle them:
- Aphids: Small, green or black bugs that suck the sap from plants. To get rid of them, spray the plant with a mixture of water and dish soap (1 teaspoon of dish soap per cup of water) or use neem oil.
- Mealybugs: White, fuzzy bugs that cluster on the leaves and stems. Wipe them off with a cotton swab dipped in rubbing alcohol, or spray the plant with neem oil.
- Yellow leaves: This can be a sign of overwatering, underwatering, or lack of sunlight. Check the soil—if it’s too wet, stop watering until it dries out. If it’s too dry, water the plant. If the soil is okay, move the plant to a sunnier spot.
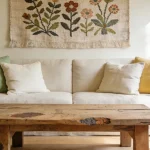
Step 6: Customize Your Garden (Make It Your Own)
Your small home garden should reflect your personal style—don’t be afraid to get creative! Here are some ideas to customize your garden:
- Paint Your Pots: Use acrylic paint to paint your terracotta pots in bright colors, patterns, or even add quotes. It’s a fun DIY project that will make your garden unique.
- Add Decorations: Add small garden gnomes, fairy lights, or decorative stones to your garden to give it a whimsical touch. For indoor gardens, you can add small figurines or candles around your plants.
- Create a Theme: Choose a theme for your garden, like bohemian (macramé hangers, colorful pots), modern (minimalist pots, sleek planters), or rustic (wooden planters, burlap accents).
- Mix & Match Plants: Combine different types of plants (succulents, herbs, trailing plants) to create visual interest. Mix colors, textures, and heights to make your garden look full and vibrant.
Final Thoughts: Embrace the Imperfection
Creating a DIY small home garden is all about having fun and learning as you go. Don’t worry if your plants don’t look perfect at first—even the most experienced gardeners have plants that die or don’t thrive. The key is to be patient, experiment, and enjoy the process. Remember, your garden is a work in progress—you can always add new plants, rearrange them, or try new things.
I hope this guide has inspired you to create your own small home garden. Whether you’re a total beginner or have a little gardening experience, you can create a beautiful, thriving garden that brings joy to your home. And if you ever have questions or need help, don’t hesitate to reach out—I’m always happy to share my tips and tricks.
Now go grab your trowel, pick out some plants, and get started—your green haven is waiting!
Happy gardening, friends!