Hi there, fellow homeowner! If you’re like me—someone who loves the comfort of their current home but craves the convenience, security, and energy savings of modern smart technology—you’ve come to the right place. I recently went through the process of upgrading my 15-year-old suburban home (located just outside Chicago, USA) from a “basic” living space to a fully functional smart home, and let me tell you: it’s not as intimidating as it sounds. You don’t need to be a tech genius, you don’t have to gut your entire house, and you definitely don’t need to break the bank. Best of all, every upgrade I made was DIY-friendly, meaning I avoided the high cost of professional installers (though I’ll share when it’s worth calling in the pros, too).
In this guide, I’m going to walk you through everything I learned—from planning your smart home upgrade to step-by-step installation of the three most impactful smart devices: smart locks, automated lighting, and smart thermostats. I’ll also share my favorite products (tested by me, not just recommended by brands), common mistakes to avoid, and how to make your smart devices work together seamlessly. Whether you’re a renter (yes, renters can do this too!), a new homeowner, or someone who’s lived in their house for decades, this guide is for you. Let’s turn your “old” home into a smart, efficient, and cozy space that works for you.
First: Why Upgrade to a Smart Home? (The Benefits That Sold Me)
Before we dive into the “how,” let’s talk about the “why.” I’ll be honest—I was skeptical at first. I thought smart home tech was just a fancy gimmick, something for tech enthusiasts who loved playing with gadgets. But after doing a little research and testing a few devices, I was hooked. Here’s what convinced me to go all-in, and what you’ll love too:
- Convenience That Saves Time: Imagine pulling into your driveway, and your garage door opens automatically, your entryway lights turn on, and your thermostat adjusts to your favorite temperature—all without lifting a finger. No more fumbling for keys in the dark, no more running back inside to turn off the lights, no more adjusting the thermostat every time the weather changes. Smart home tech takes the small, tedious tasks out of your day so you can focus on the things that matter.
- Enhanced Security (Peace of Mind Is Priceless): As a parent of two teens who are always coming and going, I sleep better at night knowing I can check if the front door is locked from my phone—even when I’m at work or out of town. Smart locks let you grant temporary access to dog walkers, babysitters, or repair people, and you’ll get a notification every time someone enters or exits your home. Pair that with smart lighting that turns on automatically when you’re away, and your home looks occupied even when it’s not.
- Energy Savings (Lower Bills = Happier Wallet): Let’s be real—utility bills are only going up. My smart thermostat alone saved me 15% on my heating and cooling bills in the first month. Smart lighting uses LED bulbs that last longer and can be scheduled to turn off when you’re not using them. Over time, these savings add up, and the devices pay for themselves.
- Flexibility (Grow Your System Over Time): The best part about upgrading to a smart home is that you don’t have to do it all at once. Start with one device (I started with a smart lock), get used to it, and then add more as your budget and needs allow. This is perfect for renters or anyone who wants to test the waters before committing.
Now, let’s get into the good stuff: how to actually upgrade your home, starting with the three most essential smart devices.
Step 1: Plan Your Smart Home Upgrade (Don’t Skip This!)
Before you buy a single device, take 30 minutes to plan. This will save you time, money, and frustration down the line. Here’s what I did to plan my upgrade:
1.1 Assess Your Home’s Current Setup
First, take a walk around your home and note a few key things:
- Wi-Fi Coverage: Smart devices rely on Wi-Fi (or other protocols like Zigbee or Thread) to connect. If your Wi-Fi signal is weak in certain areas (like the basement or garage), you’ll need a Wi-Fi extender or a smart home hub to boost the signal. I had a dead spot in my garage, so I bought a cheap Wi-Fi extender and it solved the problem.
- Electrical Wiring: For devices like smart switches and thermostats, you’ll need to check your home’s wiring. Most modern homes (built after 1990) have the necessary wiring, but older homes might need a little work. Don’t worry—I’ll cover this in detail for each device.
- Your Lifestyle: What do you use your home for most? Do you work from home? Do you have kids or pets? Do you travel often? Your lifestyle will determine which devices are most important. For example, if you travel a lot, a smart lock and security cameras are a must. If you work from home, automated lighting that mimics natural light can help boost productivity.
1.2 Choose a Smart Home Ecosystem (Keep It Simple)
One of the biggest mistakes new smart home owners make is mixing and matching devices from different ecosystems that don’t work together. For example, if you buy an Apple HomePod, you’ll want devices that work with Apple HomeKit. If you have an Amazon Echo, look for devices that work with Alexa. If you want maximum flexibility, choose devices that work with multiple ecosystems (like Google Home, Alexa, and HomeKit).
I went with Alexa because I already had an Amazon Echo, and most smart devices are compatible with it. It’s simple, user-friendly, and works with almost every brand. If you’re not sure which ecosystem to choose, start with a voice assistant (Alexa, Google Assistant, or Siri) and build from there.
1.3 Set a Budget (You Don’t Need to Spend a Fortune)
Smart home devices range in price from $20 to $500+, but you don’t need to buy the most expensive ones. Here’s a rough budget breakdown to help you plan:
- Smart Lock: $80–$200 (I spent $120 on a Eufy smart lock, and it’s been perfect)
- Automated Lighting (bulbs + switches): $20–$50 per bulb, $30–$80 per switch
- Smart Thermostat: $100–$300 (I bought a Nest Thermostat for $180, and it’s saved me hundreds in utility bills)
- Smart Hub (if needed): $50–$100
My total upgrade cost was around $500, and that included a smart lock, 4 smart bulbs, 2 smart switches, a smart thermostat, and a Wi-Fi extender. You can easily do it for less if you start small.
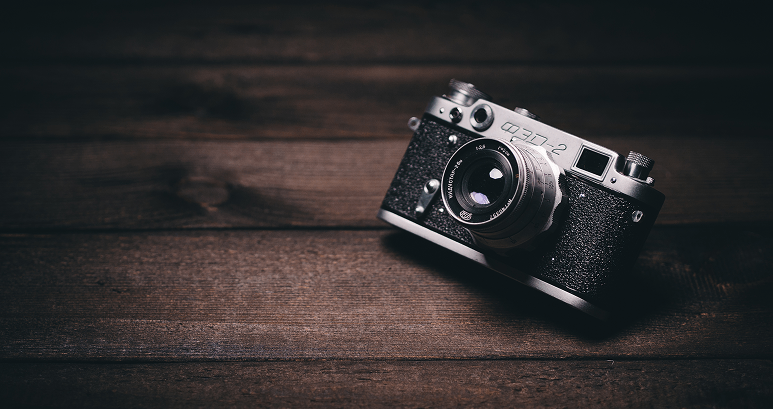
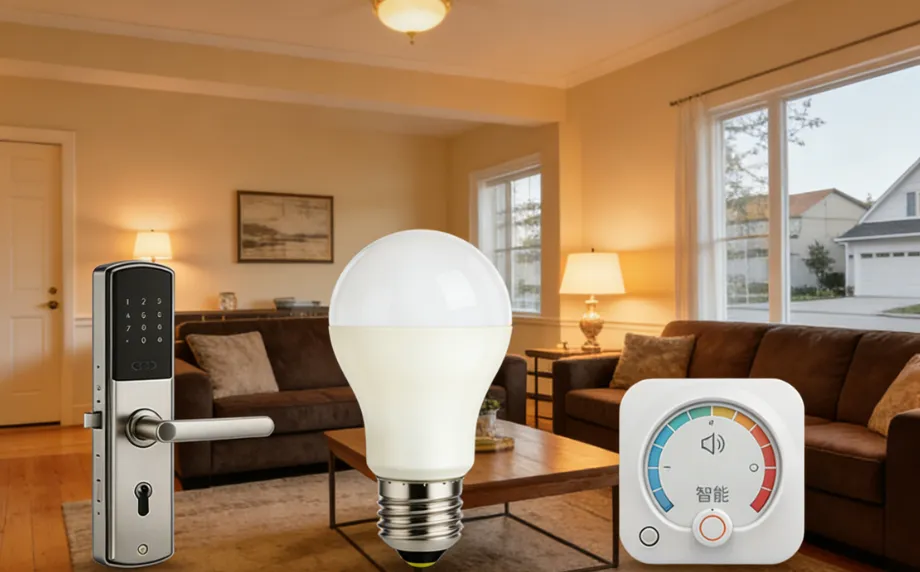
Step 2: Install a Smart Lock (The First Upgrade You Should Make)
A smart lock is hands down the most impactful smart home device you can install. It eliminates the need for keys, adds security, and gives you complete control over who enters your home. I installed my Eufy Smart Lock in about 30 minutes, and I’m not handy at all. Here’s a step-by-step guide to installing a smart lock, based on my experience:
2.1 Choose the Right Smart Lock for Your Home
First, you need to choose a smart lock that fits your door. Most smart locks are designed to fit standard door sizes (1-3/8” to 2-1/4” thick), but it’s always a good idea to measure your door before buying. Here are the three main types of smart locks, and which one is best for you:
- Deadbolt Replacement Smart Locks: These replace your existing deadbolt and are the most common type. They’re easy to install and work with most standard doors. I chose this type (Eufy Smart Lock) because it was compatible with my door and didn’t require any extra wiring.
- Smart Lock Attachments: These attach to your existing deadbolt and don’t require you to replace the entire lock. They’re perfect for renters because they’re removable and don’t damage the door. Brands like August make great attachments.
- Keypad-Only Smart Locks: These don’t have a keyhole and rely on a keypad, app, or voice command to unlock. They’re great for security, but they require a battery (which you’ll need to replace every 6-12 months).
Pro Tip: Look for a smart lock with built-in Wi-Fi (so you don’t need a hub) and a backup key (in case the battery dies). I also recommend one with auto-lock, which locks the door automatically after a few seconds—perfect for forgetful people like me!
2.2 Gather Your Tools (You Probably Already Have Them)
You don’t need any special tools to install a smart lock. Here’s what you’ll need:
- Screwdriver (Phillips and flathead)
- Drill (only if your door doesn’t already have a deadbolt hole—most do)
- Tape measure (to confirm door thickness)
- Batteries (included with most smart locks)
2.3 Step-by-Step Installation (DIY-Friendly)
I’ll walk you through the installation process using my Eufy Smart Lock, but the steps are similar for most deadbolt replacement smart locks. Before you start, read the instructions that come with your lock—every brand is a little different, but the general process is the same:
- Remove Your Existing Deadbolt: Start by removing the screws from the interior side of your deadbolt (the side inside your home). Once the screws are removed, pull the interior and exterior parts of the deadbolt apart. You may need to use a screwdriver to pry it loose, but be gentle so you don’t damage your door.
- Prepare the Door for the New Lock: Most smart locks come with an adapter plate that fits over the hole in your door. Attach the adapter plate using the screws provided. Make sure it’s level—if it’s not, the lock won’t work properly.
- Install the Exterior Lock: Slide the exterior part of the smart lock (the part with the keypad or fingerprint scanner) through the hole in the door. Make sure the wires (if any) are fed through the hole to the interior side.
- Install the Interior Lock: Attach the interior part of the lock to the exterior part using the screws provided. Make sure it’s tight so the lock doesn’t wiggle. Then, insert the batteries into the interior lock—most smart locks use 4 AA batteries.
- Pair the Lock with Your Phone: Download the app for your smart lock (Eufy Home, August Home, etc.) and follow the instructions to pair the lock with your phone via Bluetooth or Wi-Fi. You’ll need to create an account and set up a PIN code for keypad access.
- Test the Lock: Test the lock by locking and unlocking it using the app, keypad, and backup key. Make sure it works smoothly—if it’s stuck, check to see if the adapter plate is level or if the screws are too tight.
2.4 Common Mistakes to Avoid
- Not measuring your door: Make sure your door is the right thickness for the lock—most locks fit 1-3/8” to 2-1/4” thick doors, but some don’t.
- Forgetting to check battery life: Most smart locks last 6-12 months on a set of batteries, but it’s a good idea to set a reminder to replace them.
- Not testing the lock before finishing: Always test the lock with the app, keypad, and backup key to make sure it works before you put everything away.
Pro Tip: If you have a glass door or a door that can’t be drilled (like a rental), opt for a no-drill smart lock. These use adhesive or clamps to attach to your door, so you won’t damage it—and they’re just as secure as traditional smart locks.
Step 3: Install Automated Lighting (Transform Your Home’s Ambiance)
Automated lighting is the next best upgrade— it’s easy to install, affordable, and makes a huge difference in the look and feel of your home. I started with a few smart bulbs in my living room and bedroom, and now I have smart lighting throughout my house. Automated lighting lets you turn lights on/off with your phone, set schedules, dim lights, and even change colors (if you choose color-changing bulbs). Here’s how to install it:
3.1 Choose Between Smart Bulbs, Smart Switches, or Smart Plugs
There are three main ways to automate your lighting, and each has its pros and cons. Choose the one that works best for your home and lifestyle:
- Smart Bulbs: These are the easiest to install—just screw them into your existing light fixtures, pair them with your phone or voice assistant, and you’re done. They’re perfect for renters because you can take them with you when you move. The downside is that if you turn off the light switch, the smart bulb won’t work (since it’s not getting power). I use smart bulbs in my lamps and overhead lights that I don’t turn off often. Brands like Philips Hue, TP-Link Kasa, and Nanoleaf are great options.
- Smart Switches: These replace your existing light switches and are better for overhead lights that you use often. They work even if you turn the switch off (since they’re hardwired), and they let you control multiple bulbs at once. The downside is that they require a little wiring, but it’s easy to do if you’re comfortable with basic electrical work. I installed smart switches in my kitchen and hallway, and they’re a game-changer.
- Smart Plugs: These are perfect for lamps, fans, or other plug-in devices. Just plug the smart plug into an outlet, plug your device into the smart plug, and pair it with your phone. They’re cheap ($20-$30) and easy to install, but they only work for plug-in devices.
Pro Tip: If you’re new to smart lighting, start with smart bulbs—they’re the easiest and most affordable way to test the waters. Once you get used to them, you can add smart switches for overhead lights.
3.2 Installing Smart Bulbs (5-Minute DIY)
Installing smart bulbs is so easy, even my 14-year-old could do it. Here’s how:
- Turn Off the Power: Make sure the light switch is turned off before you change the bulb—safety first!
- Screw in the Smart Bulb: Screw the smart bulb into your light fixture just like you would a regular bulb.
- Turn On the Power: Turn the light switch back on. The smart bulb will blink a few times to let you know it’s ready to pair.
- Pair the Bulb with Your Phone: Download the app for your smart bulb (Philips Hue, Kasa, etc.) and follow the instructions to pair it with your phone. Most bulbs use Bluetooth or Wi-Fi to connect. If you’re using a hub (like Philips Hue Bridge), you’ll need to pair the bulb with the hub first.
- Set Up Automations: Once the bulb is paired, you can set up schedules (e.g., turn on at 6 AM, turn off at 10 PM), dim the light, or change the color (if it’s a color-changing bulb). You can also connect it to your voice assistant (Alexa, Google Assistant) to control it with your voice.
3.3 Installing Smart Switches (15-Minute DIY)
Installing smart switches is a little more involved than smart bulbs, but it’s still DIY-friendly. Before you start, make sure you’re comfortable working with electrical wiring—if not, call a professional. Here’s how I installed my TP-Link Kasa Smart Switch:
- Turn Off the Power: Go to your circuit breaker and turn off the power to the light switch you’re replacing. This is crucial—you don’t want to get shocked!
- Remove the Existing Switch: Remove the cover plate from the switch using a screwdriver. Then, remove the screws that hold the switch to the wall. Pull the switch out of the wall, and note which wires are connected to the switch (take a photo with your phone to remember).
- Disconnect the Wires: Use a screwdriver to loosen the screws that hold the wires to the switch. Pull the wires away from the switch—there should be two or three wires (black, white, and sometimes green or bare copper).
- Connect the Wires to the Smart Switch: Most smart switches have labeled terminals (LINE, LOAD, NEUTRAL, GROUND). Connect the wires to the corresponding terminals: black wire to LINE, white wire to NEUTRAL, green/bare copper wire to GROUND. If your switch doesn’t have a neutral wire (common in older homes), you’ll need a smart switch that doesn’t require a neutral wire (like the Lutron Caséta).
- Mount the Smart Switch: Push the smart switch back into the wall and secure it with the screws provided. Replace the cover plate.
- Turn On the Power: Go back to the circuit breaker and turn the power back on. The smart switch should light up, indicating it’s ready to pair.
- Pair the Switch with Your Phone: Download the app for your smart switch (Kasa, Lutron, etc.) and follow the instructions to pair it with your phone via Wi-Fi. Once paired, you can control the switch with your phone, voice, or the physical switch itself.
3.4 Automate Your Lighting (The Fun Part!)
Once your smart lighting is installed, it’s time to set up automations. This is where the magic happens. Here are my favorite automations that I use every day:
- Morning Routine: My bedroom lights turn on gradually at 6:30 AM (mimicking natural light) to help me wake up gently—no more harsh alarm clocks!
- Evening Routine: At 7:00 PM, my living room lights dim to 50% and change to a warm yellow color to create a cozy ambiance.
- Away Mode: When I leave the house (detected by my phone’s location), all my lights turn off automatically. I also have a “vacation mode” that turns lights on and off randomly to make it look like someone’s home.
- Voice Control: I can say “Alexa, turn on the kitchen lights” or “Alexa, dim the living room lights to 30%” and it happens instantly—perfect when my hands are full.
Pro Tip: Thanks to the Matter protocol, most smart lighting brands now work together. That means you can control Philips Hue, TP-Link Kasa, and Nanoleaf lights all in one app—no more switching between apps. This is a game-changer for anyone who wants a seamless smart home experience.
Step 4: Install a Smart Thermostat (Save Money on Utility Bills)
A smart thermostat is one of the most practical smart home devices— it learns your habits, adjusts the temperature automatically, and saves you money on heating and cooling bills. I installed a Nest Thermostat, and it’s been one of my favorite upgrades. It’s easy to install, and I’ve seen a noticeable difference in my utility bills. Here’s how to install one:
3.1 Choose the Right Smart Thermostat
First, you need to choose a smart thermostat that’s compatible with your home’s heating and cooling system. Most smart thermostats work with central heating and cooling, heat pumps, and boilers, but it’s always a good idea to check compatibility before buying. Here are my top recommendations:
- Nest Thermostat: Easy to install, user-friendly, and works with most systems. It learns your habits and adjusts the temperature automatically. I have the Nest Learning Thermostat, and it’s been perfect.
- Ecobee SmartThermostat: Great for homes with multiple rooms (it works with room sensors to adjust the temperature in different areas). It also has built-in Alexa, so you can control it with your voice.
- Honeywell Home T9: Affordable, compatible with most systems, and has room sensors for better temperature control.
Pro Tip: Check if your utility company offers a rebate for installing a smart thermostat—many do! I got a $50 rebate from my local utility company, which helped offset the cost.
3.2 Gather Your Tools
You’ll need a few basic tools to install a smart thermostat:
- Screwdriver (Phillips and flathead)
- Voltage tester (to make sure the power is off)
- Drill (only if you need to drill new holes for the mounting plate)
- Wire strippers (if you need to strip the wires)
3.3 Step-by-Step Installation
Installing a smart thermostat is similar to installing a smart switch—you’ll be working with electrical wiring, so make sure to turn off the power first. Here’s how I installed my Nest Thermostat:
- Turn Off the Power: Go to your circuit breaker and turn off the power to your heating and cooling system. Use a voltage tester to make sure there’s no power running to the thermostat wires.
- Remove the Existing Thermostat: Remove the cover plate from your existing thermostat. Then, remove the screws that hold the thermostat to the wall. Pull the thermostat off the wall, and note which wires are connected to which terminals (take a photo with your phone—this is crucial!). Most thermostats have wires labeled R, C, W, Y, G—write down which wire is connected to each terminal.
- Disconnect the Wires: Use a screwdriver to loosen the screws that hold the wires to the thermostat. Pull the wires away from the thermostat—be careful not to let them fall back into the wall (you can tape them to the wall to keep them in place).
- Install the Mounting Plate: Take the mounting plate that comes with your smart thermostat and hold it against the wall. Use a level to make sure it’s straight. Mark the holes where you’ll need to drill (if your existing holes don’t line up). Drill the holes, insert the anchors (if needed), and secure the mounting plate to the wall with the screws provided.
- Connect the Wires: Connect the wires to the corresponding terminals on the mounting plate. Most smart thermostats have labeled terminals (R, C, W, Y, G)—match the wires to the labels. If your existing thermostat doesn’t have a C wire (common in older homes), you may need to use a C wire adapter (included with most smart thermostats) or hire an electrician to install one. The C wire provides constant power to the smart thermostat, so it’s important if you want features like Wi-Fi connectivity.
- Attach the Smart Thermostat: Snap the smart thermostat onto the mounting plate. It should click into place.
- Turn On the Power: Go back to the circuit breaker and turn the power back on. The smart thermostat will turn on and guide you through the setup process (connecting to Wi-Fi, setting your time zone, etc.).
- Calibrate the Thermostat: The smart thermostat will calibrate itself to your home’s temperature. This may take a few minutes. Once calibrated, you can set your desired temperature and start using it.
3.4 Set Up Automations (Save Money Without Lifting a Finger)
The best part about a smart thermostat is its ability to learn your habits and adjust the temperature automatically. Here’s how to set up automations to save money:
- Learning Mode: Most smart thermostats (like Nest) have a learning mode that learns your schedule over time. For example, if you usually turn the temperature down to 68°F at night, it will start doing it automatically after a few days.
- Away Mode: When you leave the house (detected by your phone’s location), the thermostat will turn the temperature up (in summer) or down (in winter) to save energy. I save about 10% on my bills just with this feature.
- Schedule: You can set a schedule for weekdays and weekends. For example, I set the temperature to 72°F when I wake up, 68°F when I leave for work, 70°F when I get home, and 65°F at night.
- Remote Control: If you’re running late or decide to stay out longer, you can adjust the temperature from your phone. No more wasting energy heating or cooling an empty house.
Pro Tip: According to Energy.gov, lighting accounts for roughly 15% of the average home’s power use, and smart thermostats can reduce heating and cooling costs by 10-15%. Combining smart lighting and a smart thermostat is a great way to maximize energy savings.
Step 5: Connect Your Smart Devices (Make Them Work Together)
Once you have your smart lock, automated lighting, and smart thermostat installed, it’s time to connect them so they work together. This is called “home automation,” and it’s what makes a smart home truly convenient. Here’s how to do it:
5.1 Use a Smart Home Hub (If Needed)
Most smart devices connect directly to Wi-Fi, but if you have devices that use Zigbee or Thread (like some smart locks and sensors), you’ll need a smart home hub to connect them. Popular hubs include Amazon Echo (which has a built-in Zigbee hub), Google Nest Hub, and Samsung SmartThings. I use an Amazon Echo, and it connects all my devices seamlessly.
5.2 Set Up Scenes and Routines
Scenes and routines are the key to making your smart devices work together. A “scene” is a set of actions that happen with one command, and a “routine” is a scene that’s triggered automatically. Here are my favorite routines:
- “Good Morning” Routine: When I say “Alexa, good morning,” my bedroom lights turn on gradually, my thermostat adjusts to 72°F, and my coffee maker turns on (I added a smart plug to my coffee maker). It’s the perfect way to start the day.
- “Good Night” Routine: When I say “Alexa, good night,” all my lights turn off, my smart lock locks the door, and my thermostat adjusts to 65°F. I don’t have to worry about forgetting anything before bed.
- “I’m Home” Routine: When my phone connects to my home Wi-Fi (or I say “Alexa, I’m home”), my entryway lights turn on, my thermostat adjusts to 70°F, and my smart lock unlocks the door (if I want it to).
Setting up routines is easy—just use the app for your voice assistant (Alexa, Google Assistant) and follow the instructions to add actions and triggers.
Step 6: Maintain Your Smart Home (Keep It Running Smoothly)
Once your smart home is set up, it’s important to maintain it to keep it running smoothly. Here are a few tips:
- Update Your Devices: Regularly update the firmware on your smart devices and apps to fix bugs and add new features. Most devices update automatically, but it’s a good idea to check occasionally.
- Replace Batteries: Smart locks and sensors use batteries—set a reminder to replace them every 6-12 months. Most devices will send you a notification when the battery is low.
- Check Wi-Fi Connection: If your smart devices are acting up, check your Wi-Fi signal. A weak signal can cause devices to disconnect. Use a Wi-Fi extender if needed.
- Test Your Devices: Every few months, test your smart lock, lighting, and thermostat to make sure they’re working properly. This will help you catch any issues early.
Final Thoughts: You Can Do This!
Upgrading your existing home to a smart home doesn’t have to be hard, expensive, or intimidating. I did it myself, and if I can do it, you can too. Start small, plan ahead, and choose devices that fit your lifestyle and budget. The convenience, security, and energy savings are worth it—trust me.
If you have any questions or run into issues, don’t hesitate to reach out. I’m happy to help! And if you’ve already upgraded your home to a smart home, share your favorite devices and automations in the comments below—I’d love to hear them.
Here’s to a smarter, more comfortable, and more efficient home—cheers!